手写RPC框架系列(十) - 客户端与服务端示例及调用流程
手写RPC框架系列(十) - 客户端与服务端示例及调用流程
在前面的章节中,我们详细探讨了RPC框架的各个组成部分,包括网络通信、编解码、请求处理和应答等。本章将通过创建客户端和服务端的示例模块,来演示如何使用我们自己实现的 RPC 框架进行远程方法调用。
本章的大致内容如下:
- 创建公共 API 模块。
- 创建 客户端示例。
- 创建 服务端示例。
- 发起 RPC 调用以及观察调用结果。
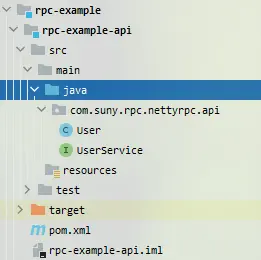
1. 创建 rpc-example-api 模块
首先,我们创建一个名为 rpc-example-api 的Maven模块,用于存放服务接口和实体类。
- 在
pom.xml中添加必要的依赖和配置。
   <?xml version="1.0" encoding="UTF-8"?>
   <project xmlns="http://maven.apache.org/POM/4.0.0"
            xmlns:xsi="http://www.w3.org/2001/XMLSchema-instance"
            xsi:schemaLocation="http://maven.apache.org/POM/4.0.0 http://maven.apache.org/xsd/maven-4.0.0.xsd">
       <parent>
           <artifactId>rpc-example</artifactId>
           <groupId>com.suny.rpc</groupId>
           <version>1.0.0-SNAPSHOT</version>
       </parent>
       <modelVersion>4.0.0</modelVersion>
       <artifactId>rpc-example-api</artifactId>
       <packaging>jar</packaging>

       <properties>
           <maven.compiler.source>8</maven.compiler.source>
           <maven.compiler.target>8</maven.compiler.target>
       </properties>

   </project>
- 创建一个接口
UserService,定义要调用的远程方法selectById。
   package com.suny.rpc.nettyrpc.api;

   public interface UserService {

       User selectById(String id);

   }
- 创建实体类,用于方法返回值。
   package com.suny.rpc.nettyrpc.api;

   import lombok.Data;

   import java.io.Serializable;

   @Data
   public class User implements Serializable {

       private String id;

       private String username;
   }
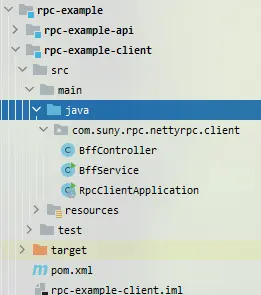
2. 客户端示例
首先,我们创建一个Maven模块,命名为rpc-example-client,用于演示如何使用RPC框架的客户端。
- 在
pom.xml中添加对rpc-core模块的依赖。
   <?xml version="1.0" encoding="UTF-8"?>
   <project xmlns="http://maven.apache.org/POM/4.0.0"
            xmlns:xsi="http://www.w3.org/2001/XMLSchema-instance"
            xsi:schemaLocation="http://maven.apache.org/POM/4.0.0 http://maven.apache.org/xsd/maven-4.0.0.xsd">
       <parent>
           <artifactId>rpc-example</artifactId>
           <groupId>com.suny.rpc</groupId>
           <version>1.0.0-SNAPSHOT</version>
       </parent>
       <modelVersion>4.0.0</modelVersion>
       <artifactId>rpc-example-client</artifactId>

       <properties>
           <maven.compiler.source>8</maven.compiler.source>
           <maven.compiler.target>8</maven.compiler.target>
       </properties>

       <dependencies>
           <dependency>
               <groupId>org.springframework.boot</groupId>
               <artifactId>spring-boot-starter-web</artifactId>
           </dependency>
           <dependency>
               <groupId>com.suny.rpc</groupId>
               <artifactId>rpc-core</artifactId>
               <version>1.0.0-SNAPSHOT</version>
           </dependency>

           <dependency>
               <groupId>com.suny.rpc</groupId>
               <artifactId>rpc-example-api</artifactId>
               <version>1.0.0-SNAPSHOT</version>
           </dependency>

           <dependency>
               <groupId>org.springframework.boot</groupId>
               <artifactId>spring-boot-starter</artifactId>
           </dependency>
       </dependencies>

       <build>
           <plugins>
               <plugin>
                   <groupId>org.apache.maven.plugins</groupId>
                   <artifactId>maven-compiler-plugin</artifactId>
                   <version>3.8.1</version>
                   <configuration>
                       <source>1.8</source>
                       <target>1.8</target>
                       <encoding>UTF-8</encoding>
                   </configuration>
               </plugin>
               <plugin>
                   <groupId>org.springframework.boot</groupId>
                   <artifactId>spring-boot-maven-plugin</artifactId>
                   <version>2.3.7.RELEASE</version>
                   <configuration>
                       <mainClass>com.suny.rpc.nettyrpc.client.NettyRpcApplication</mainClass>
                   </configuration>
                   <executions>
                       <execution>
                           <id>repackage</id>
                           <goals>
                               <goal>repackage</goal>
                           </goals>
                       </execution>
                   </executions>
               </plugin>
           </plugins>
       </build>

   </project>
- 定义 Spring Boot 启动类
RpcClientApplication
   package com.suny.rpc.nettyrpc.client;

   import com.suny.rpc.nettyrpc.core.annotations.RpcServiceScan;
   import com.suny.rpc.nettyrpc.core.client.NettyClient;
   import com.suny.rpc.nettyrpc.core.serialize.SerializerFactory;
   import org.springframework.beans.factory.annotation.Autowired;
   import org.springframework.boot.CommandLineRunner;
   import org.springframework.boot.SpringApplication;
   import org.springframework.boot.autoconfigure.SpringBootApplication;

   import java.util.concurrent.CountDownLatch;

   @RpcServiceScan
   @SpringBootApplication(scanBasePackages = {"com.suny.rpc.nettyrpc.**"})
   public class RpcClientApplication implements CommandLineRunner {

       @Autowired
       private SerializerFactory serializerFactory;

       public static void main(String[] args) {
           SpringApplication.run(RpcClientApplication.class, args);
       }

       @Override
       public void run(String... args) throws Exception {
           NettyClient nettyClient = new NettyClient(serializerFactory);

           new CountDownLatch(1).await();
       }
   }
- 创建一个
BffService用于调用远程的UserService.selectById()函数。
   package com.suny.rpc.nettyrpc.client;

   import com.suny.rpc.nettyrpc.api.User;
   import com.suny.rpc.nettyrpc.api.UserService;
   import com.suny.rpc.nettyrpc.core.annotations.Reference;
   import lombok.extern.slf4j.Slf4j;
   import org.springframework.stereotype.Service;

   @Service
   @Slf4j
   public class BffService {

       @Reference
       private UserService userService;


       public User getUserInfo() {
           String userId = "1";
           User user = userService.selectById(userId);
           log.debug("getUserInfo rpc调用结果: {}", user.toString());
           return user;
       }


   }
- 创建
BffController用于暴露 Http 方法供我们测试
   package com.suny.rpc.nettyrpc.client;

   import com.suny.rpc.nettyrpc.api.User;
   import org.springframework.beans.factory.annotation.Autowired;
   import org.springframework.web.bind.annotation.GetMapping;
   import org.springframework.web.bind.annotation.RequestMapping;
   import org.springframework.web.bind.annotation.RestController;

   @RequestMapping("/test")
   @RestController
   public class BffController {

       @Autowired
       private BffService bffService;

       @GetMapping
       public User testUser() {
           return bffService.getUserInfo();
       }
   }
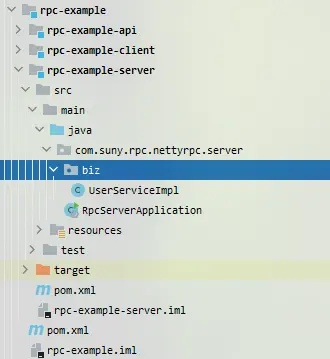
3. 服务端示例
接下来,我们创建一个Maven模块,命名为rpc-example-server,用于演示 RPC 框架的服务端例子。
- 在
pom.xml中添加对rpc-core模块的依赖。
   <?xml version="1.0" encoding="UTF-8"?>
   <project xmlns="http://maven.apache.org/POM/4.0.0"
            xmlns:xsi="http://www.w3.org/2001/XMLSchema-instance"
            xsi:schemaLocation="http://maven.apache.org/POM/4.0.0 http://maven.apache.org/xsd/maven-4.0.0.xsd">
       <parent>
           <artifactId>rpc-example</artifactId>
           <groupId>com.suny.rpc</groupId>
           <version>1.0.0-SNAPSHOT</version>
       </parent>
       <modelVersion>4.0.0</modelVersion>
       <artifactId>rpc-example-server</artifactId>
       <packaging>jar</packaging>

       <properties>
           <maven.compiler.source>8</maven.compiler.source>
           <maven.compiler.target>8</maven.compiler.target>
       </properties>

       <dependencies>
           <dependency>
               <groupId>com.suny.rpc</groupId>
               <artifactId>rpc-core</artifactId>
               <version>1.0.0-SNAPSHOT</version>
           </dependency>
           <dependency>
               <groupId>com.suny.rpc</groupId>
               <artifactId>rpc-example-api</artifactId>
               <version>1.0.0-SNAPSHOT</version>
           </dependency>
           <dependency>
               <groupId>org.springframework.boot</groupId>
               <artifactId>spring-boot-starter</artifactId>
           </dependency>
       </dependencies>

       <build>
           <plugins>
               <plugin>
                   <groupId>org.apache.maven.plugins</groupId>
                   <artifactId>maven-compiler-plugin</artifactId>
                   <version>3.8.1</version>
                   <configuration>
                       <source>1.8</source>
                       <target>1.8</target>
                       <encoding>UTF-8</encoding>
                   </configuration>
               </plugin>
               <plugin>
                   <groupId>org.springframework.boot</groupId>
                   <artifactId>spring-boot-maven-plugin</artifactId>
                   <version>2.3.7.RELEASE</version>
                   <configuration>
                       <mainClass>com.suny.rpc.nettyrpc.server.RpcServerApplication</mainClass>
                   </configuration>
                   <executions>
                       <execution>
                           <id>repackage</id>
                           <goals>
                               <goal>repackage</goal>
                           </goals>
                       </execution>
                   </executions>
               </plugin>
           </plugins>
       </build>

   </project>
- 创建 Spring Boot 启动类
RpcServerApplication
   package com.suny.rpc.nettyrpc.server;

   import com.suny.rpc.nettyrpc.core.annotations.RpcServiceScan;
   import com.suny.rpc.nettyrpc.core.serialize.SerializerFactory;
   import com.suny.rpc.nettyrpc.core.server.NettyServer;
   import com.suny.rpc.nettyrpc.core.server.NettyServerProperties;
   import org.springframework.beans.factory.annotation.Autowired;
   import org.springframework.boot.CommandLineRunner;
   import org.springframework.boot.SpringApplication;
   import org.springframework.boot.autoconfigure.SpringBootApplication;

   import java.util.concurrent.CountDownLatch;

   @RpcServiceScan(basePackages = "com.suny.rpc.nettyrpc.**")
   @SpringBootApplication
   public class RpcServerApplication implements CommandLineRunner {

       @Autowired
       private SerializerFactory serializerFactory;

       @Autowired
       private NettyServerProperties nettyServerProperties;

       public static void main(String[] args) {
           SpringApplication.run(RpcServerApplication.class, args);
       }

       @Override
       public void run(String... args) throws Exception {
           new NettyServer(nettyServerProperties.getServerPort(), serializerFactory);
           new CountDownLatch(1).await();
       }
   }
- 实现接口
UserService并注册到 RPC 工厂中
   package com.suny.rpc.nettyrpc.server.biz;

   import com.suny.rpc.nettyrpc.api.User;
   import com.suny.rpc.nettyrpc.api.UserService;
   import com.suny.rpc.nettyrpc.core.annotations.RpcService;
   import org.apache.commons.lang3.RandomStringUtils;


   @RpcService
   public class UserServiceImpl implements UserService {

       @Override
       public User selectById(String id) {
           User user = new User();
           user.setId(id);
           user.setUsername(RandomStringUtils.randomAlphabetic(5));
           return user;
       }
   }
4. 发起调用与结果
启动本地的 Zookeeper ,端口号为 2181。
启动
RpcServerApplication。启动
RpcServerApplication。调用客户端测试 Http 接口 :
curl http://localhost:8080/test/
- 可以看到控制台输出了远程方法调用的结果:
getUserInfo rpc调用结果: User(id=1001, username=用户名)
5. 总结
本章我们通过创建客户端和服务端的示例模块,演示了如何使用自己实现的RPC框架进行远程方法调用。了解了客户端如何通过代理对象发起调用,服务端如何注册和处理请求,以及调用结果的返回过程。
同时通过展示了我们的 RPC 框架的基本使用方法,起到一个边学边实践的效果。